Antons Video Productions
4 Woolpack Street
Braemar 2575 Southern Highlands
NSW Australia
+61 2 418 626 417
EDIUS SP hardware RS-422 Device Setup
Capture and Print to Tape with RS-422
(example shows Betacam SP setup with PAL 16:9)
1. Go to System Settings, Hardware, click Device Preset, then click New
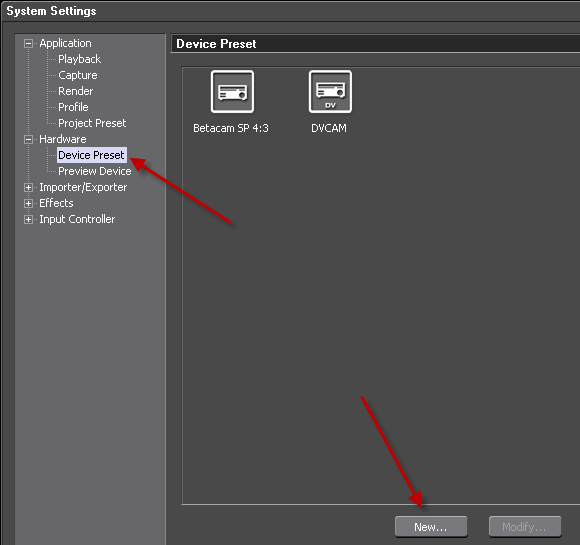
2. Type a file name and select a suitable Icon
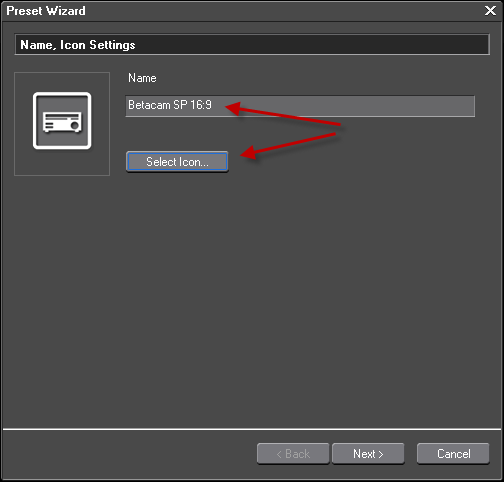
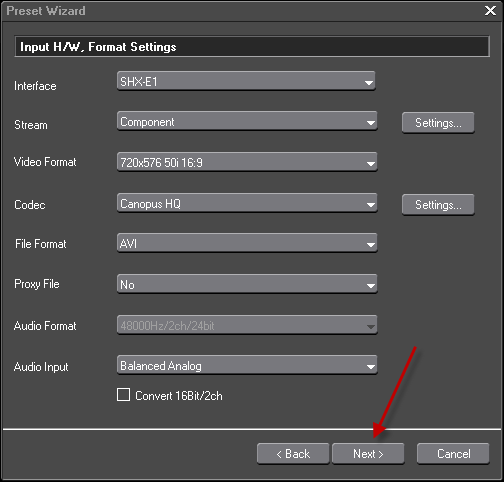
3. Select all Input Hardware settings as seen below, and choose your desired video format such as Pal or NTSC, 4:3 or 16:9
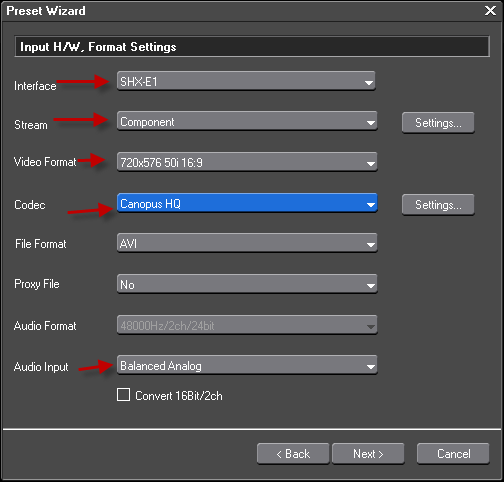
4. Click the capture codec settings button and choose desired quality
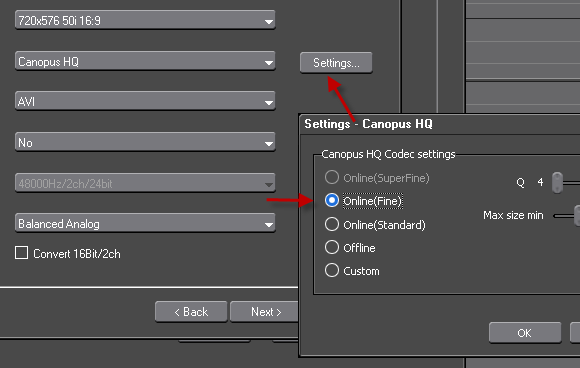
5. Click the Stream settings button
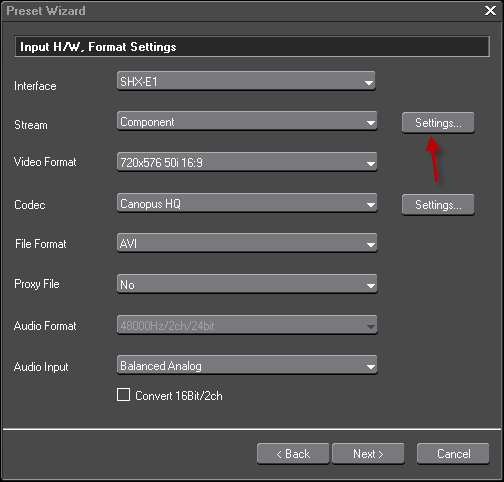
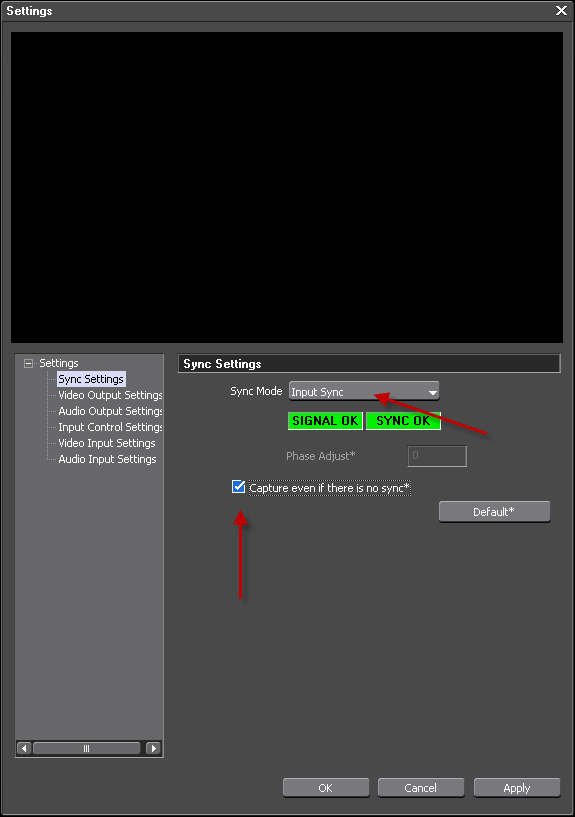
6. Select Sync to Input Sync or external Ref in case you use external Ref
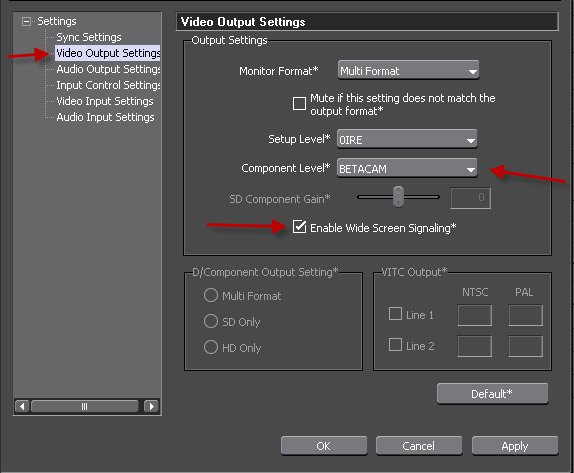
7. Select the following Video Output settings
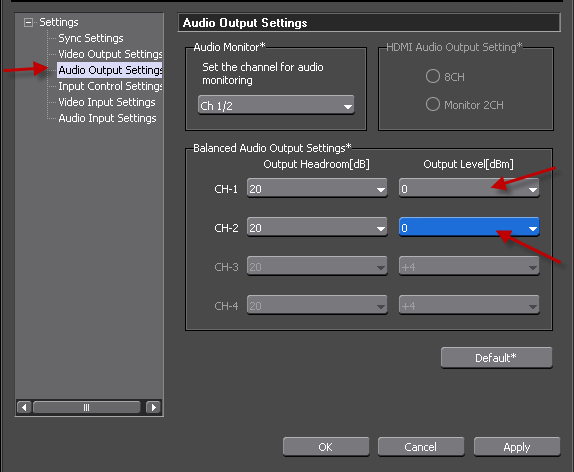
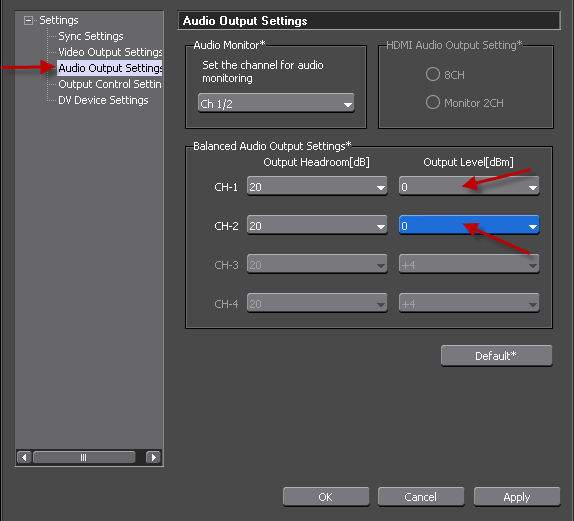
8. Choose your preferred audio output level such as 0db or +4db
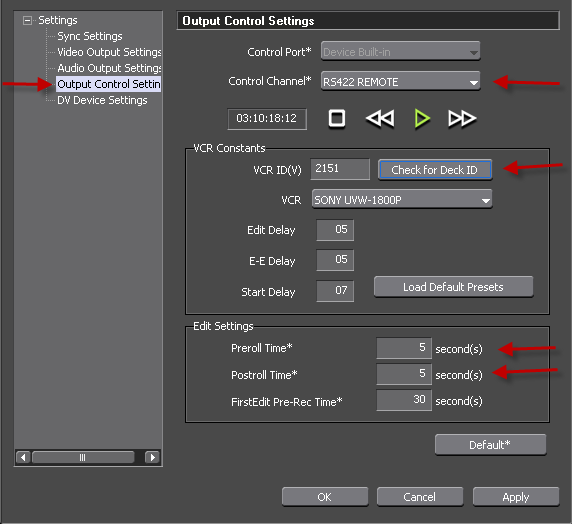
9. Select RS-422 and choose a desired preroll time for capture
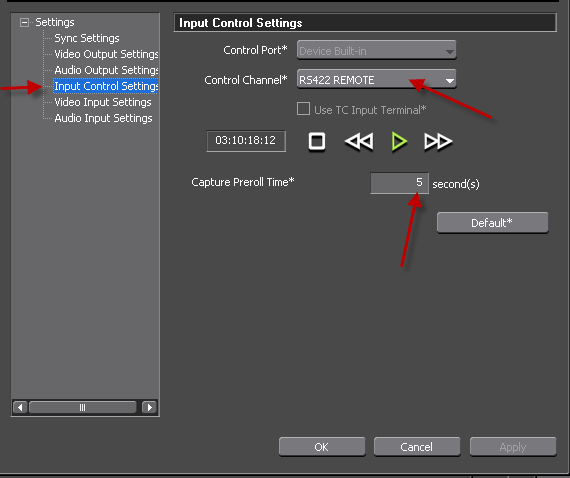
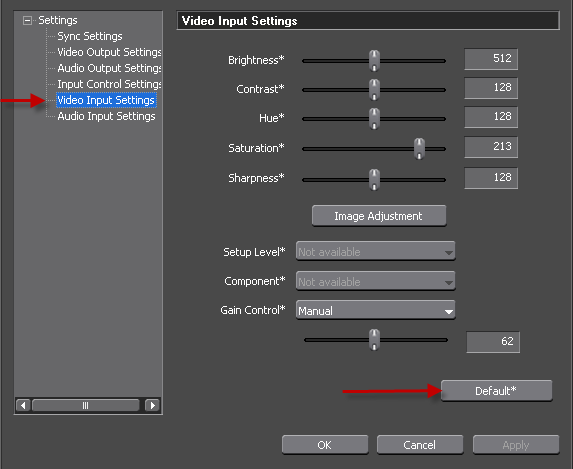
10. Leave all Input level and enhancement settings at default
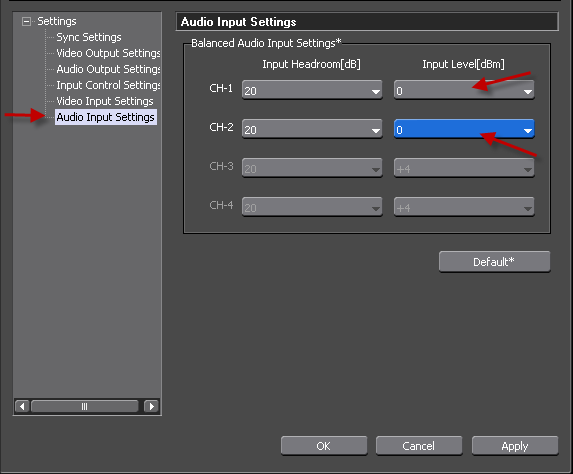
11. Choose your desired audio Input level settings
12. Click Next
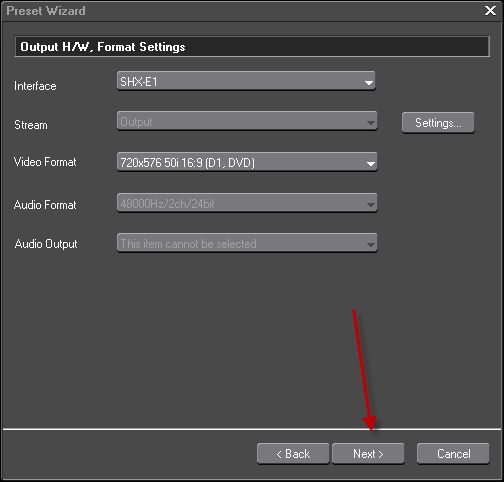
13. Choose the Output Hardware and Video Format
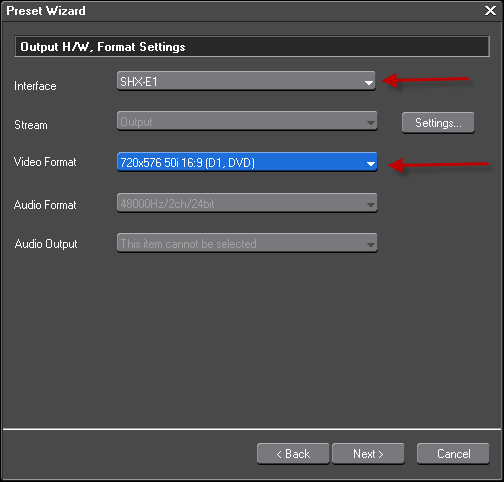
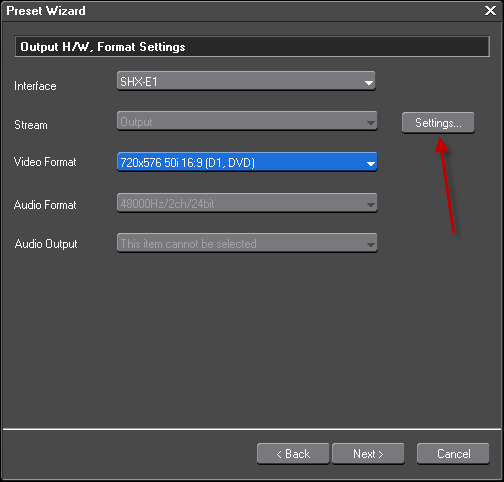
14. Click Stream settings
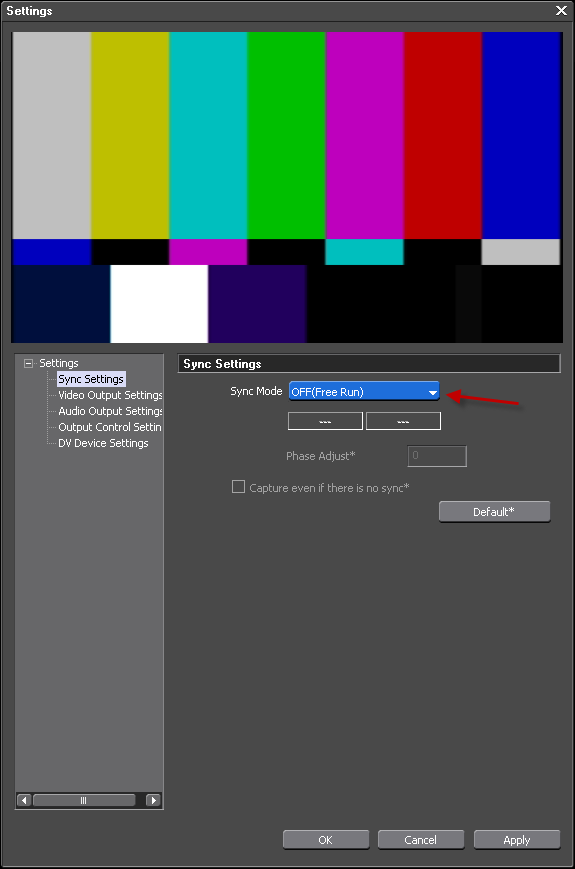
15. Set Sync mode to OFF or external Ref if you are using external Ref
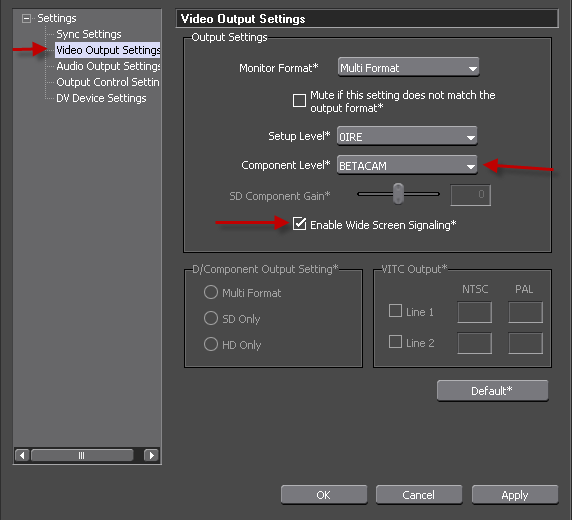
16. Set Video Output settings as seen below
17. Set Audio Output to desired db levels
18. Choose RS-422, make sure the deck is connected and turned on, click Check for deck ID and set your desired preroll and postroll for print to tape operation
19. Click Next
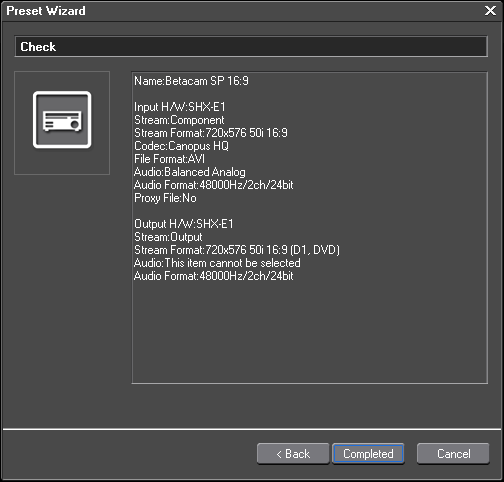
20. Click Completed
21. Assign an Input Preset by right click of the newly created Icon
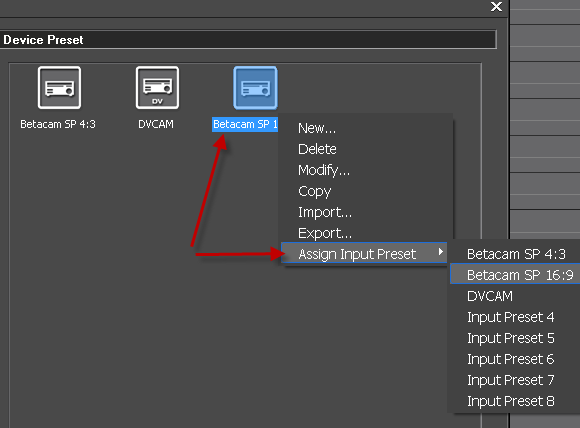
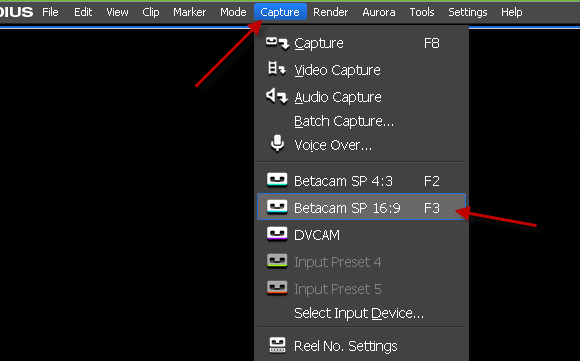
22. Capturing is now very simple, select your preset and off you go, or press shortcut
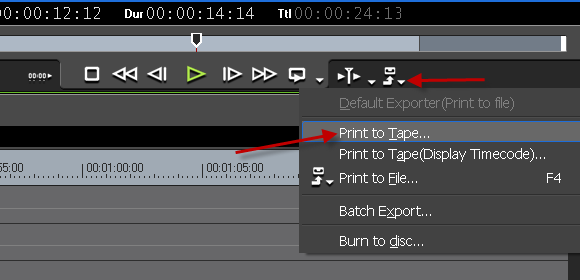
23. Print to tape is also simple now, mark in and out on timeline, click Print to Tape
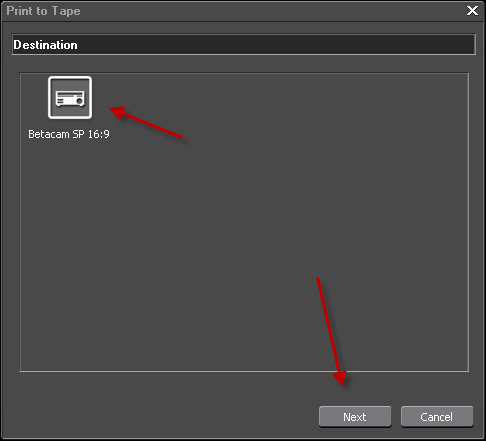
24. Your Device will be shown, click next
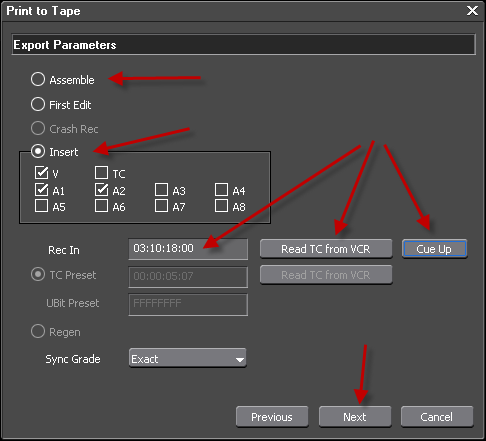
25. Choose Assemble or Insert, click read TC from VCR, type a desired start time and click Cue Up, then click Next
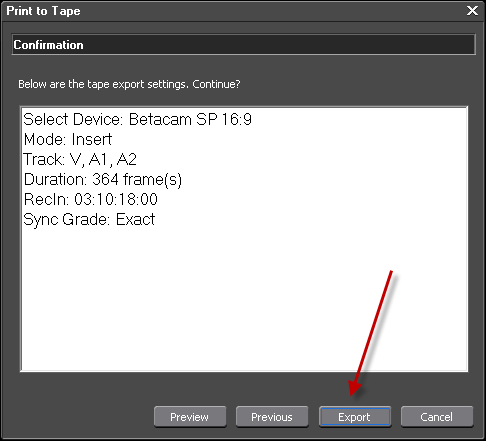
26. A confirmation dialog will be shown, if happy, click export
Back to more Video Editing Tips and Tricks