Antons Video Productions
20 Solander Ave
West Hoxton 2171 NSW, Australia
+612 9825 9999
Using EDIUS to export HD H264 for use in Final Cut Pro
1. Set the EDIUS Project setting to 1920x1080, this can be done after editing is complete
(works with 960x720, 1280x720, 1440x1080 or 1920x1080 timeline)
You can also use these steps for standard definition, in that case match the destination size to be the same as the project setting
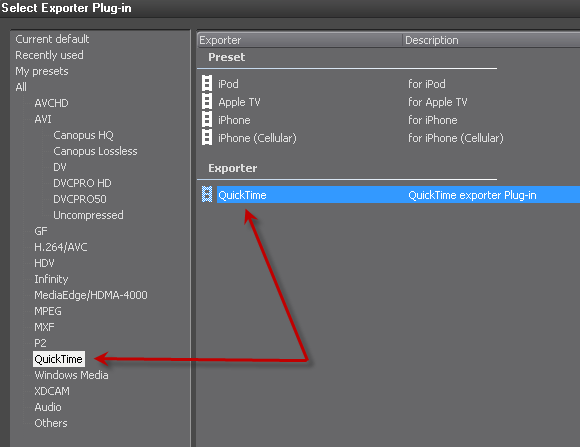
2. Mark your in and out and then click print to file, choose QuickTime and then QuickTime Exporter Plug-in
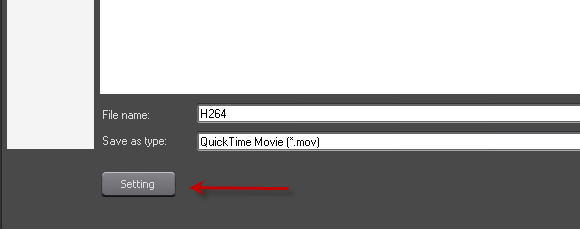
3. Type a file name and click the Settings Button
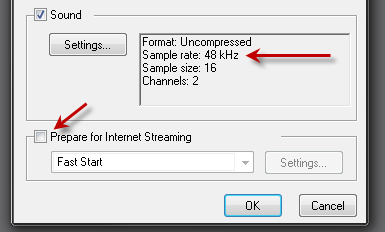
4. Untick the Fast Start Option and set sound to 48 Khz, 16bit uncompressed
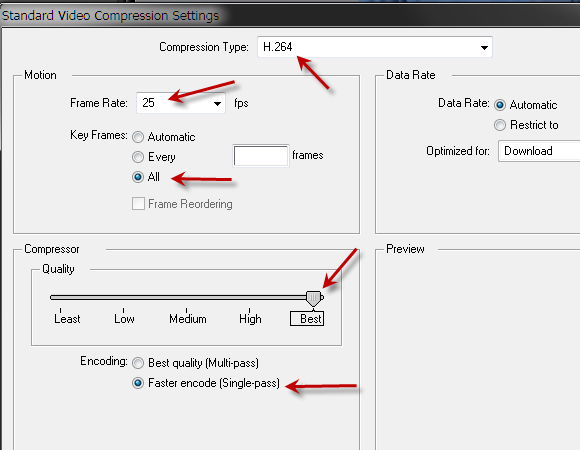
5. Click the Video Settings Button, set Compression Type to H264, set Frame Rate the same as the project setting, set Key Frames to All, set quality to best, single-pass will provide good quality, if you have time, try multi-pass
6. Click the Size button and set to HD 1920x1080
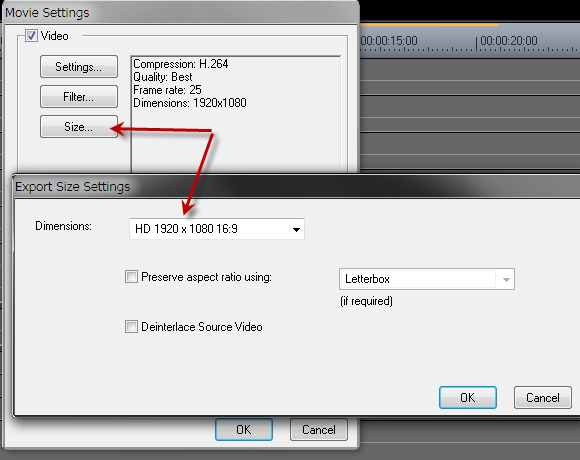
7. Start the Export, Encoding speed is faster than real-time on a decent system
Back to more Video Editing Tips and Tricks